2009.10.27: Jason EEMC geometry: comparison without LOW_EM option
Monte-Carlo setup:
- One photon per event
- Disabled new SMD layers (EXPS EBLS EFLS) in Jason geometry
- EEMC only and Full STAR geometry configurations without LOW_EM option
(using Victor's geometry fix)
- Throw particles flat in eta (1.08, 2.0), phi (0, 2pi), and pt (6-10 GeV)
- Using A2Emaker to get reconstructed Tower/SMD energy
(no EEMC SlowSimulator in chain)
- Vertex z=0
- ~50K/per particle type
- Non-zero energy: 3 sigma above pedestal
Geometry configurations and notations (shown in the center of the plot):
- eemc-cvs: EEMC only with geometry file from CVS (cAir-fixed)
- full-cvs: Full STAR with geometry file from CVS (cAir-fixed)
- eemc-j-noL: EEMC only with Jason geometry file (disabled 3-new SMD layers)
- full-j-noL: Full STAR with Jason geometry file (disabled 3-new SMD layers)
Figure 1: Sampling fraction 1x1
![](/STAR/files/userfiles/133/image/20091027_1/20091027_photons_eemcCvsNoEM_eemcJnoEM_fullCvsNoEM_fullJnoLnoEM_eta120_190_pt60_100_hist1D_sampling1x1_log0.png)
Figure 2: Sampling fraction 2x1
![](/STAR/files/userfiles/133/image/20091027_1/20091027_photons_eemcCvsNoEM_eemcJnoEM_fullCvsNoEM_fullJnoLnoEM_eta120_190_pt60_100_hist1D_sampling2x1_log0.png)
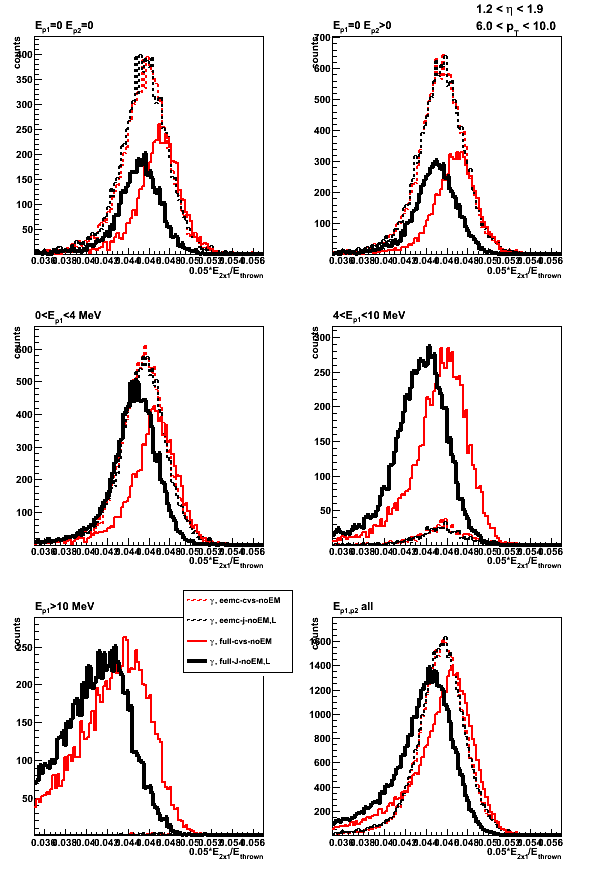
Figure 3: Sampling fraction 3x3
![](/STAR/files/userfiles/133/image/20091027_1/20091027_photons_eemcCvsNoEM_eemcJnoEM_fullCvsNoEM_fullJnoLnoEM_eta120_190_pt60_100_hist1D_sampling3x3_log0.png)
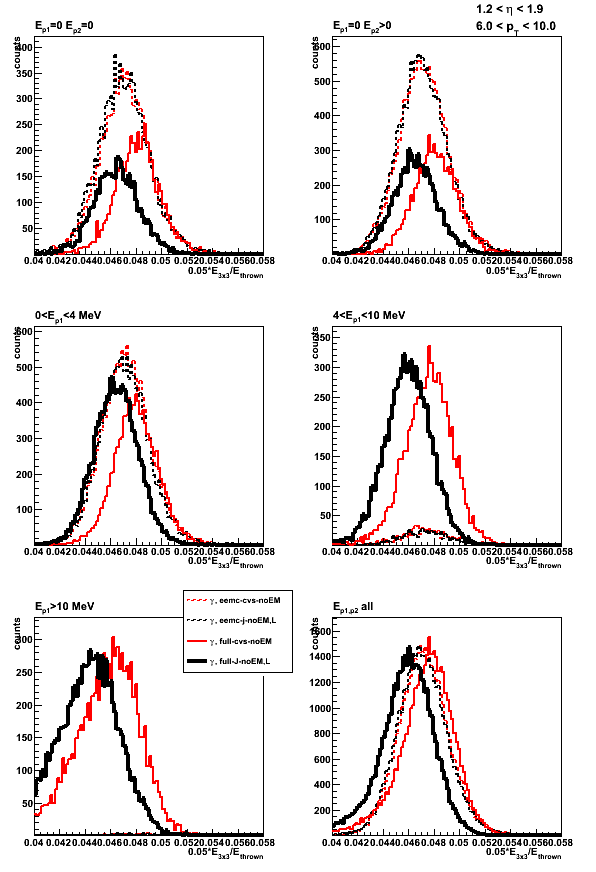
Figure 4: Sampling fraction total energy
![](/STAR/files/userfiles/133/image/20091027_1/20091027_photons_eemcCvsNoEM_eemcJnoEM_fullCvsNoEM_fullJnoLnoEM_eta120_190_pt60_100_hist1D_towSampling_log0.png)
Figure 5: Sampling fraction pre1-shower
![](/STAR/files/userfiles/133/image/20091027_1/20091027_photons_eemcCvsNoEM_eemcJnoEM_fullCvsNoEM_fullJnoLnoEM_eta120_190_pt60_100_hist1D_samplingPre1_log0.png)
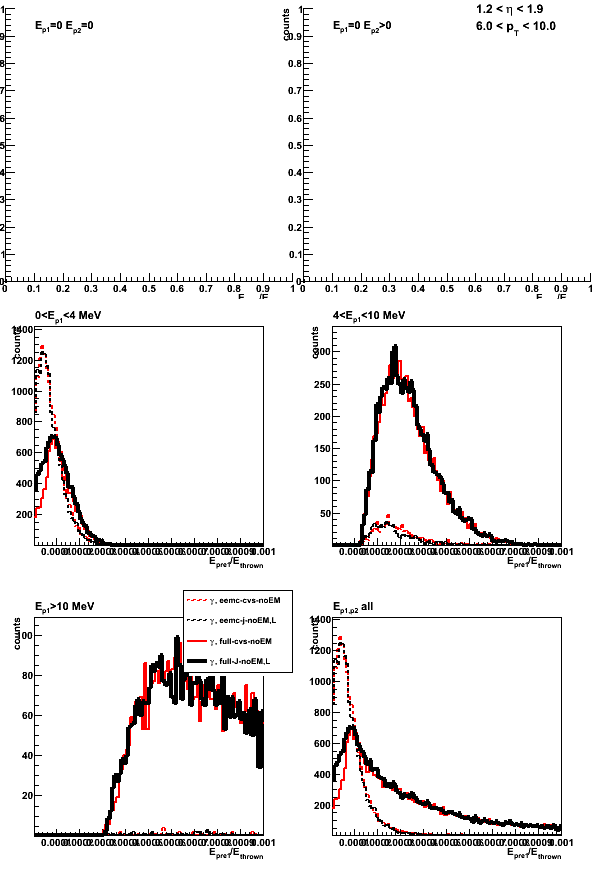
Figure 6: Sampling fraction pre2-shower
![](/STAR/files/userfiles/133/image/20091027_1/20091027_photons_eemcCvsNoEM_eemcJnoEM_fullCvsNoEM_fullJnoLnoEM_eta120_190_pt60_100_hist1D_samplingPre2_log0.png)
Figure 7: Sampling fraction smd-u
![](/STAR/files/userfiles/133/image/20091027_1/20091027_photons_eemcCvsNoEM_eemcJnoEM_fullCvsNoEM_fullJnoLnoEM_eta120_190_pt60_100_hist1D_samplingSmdU_log0.png)
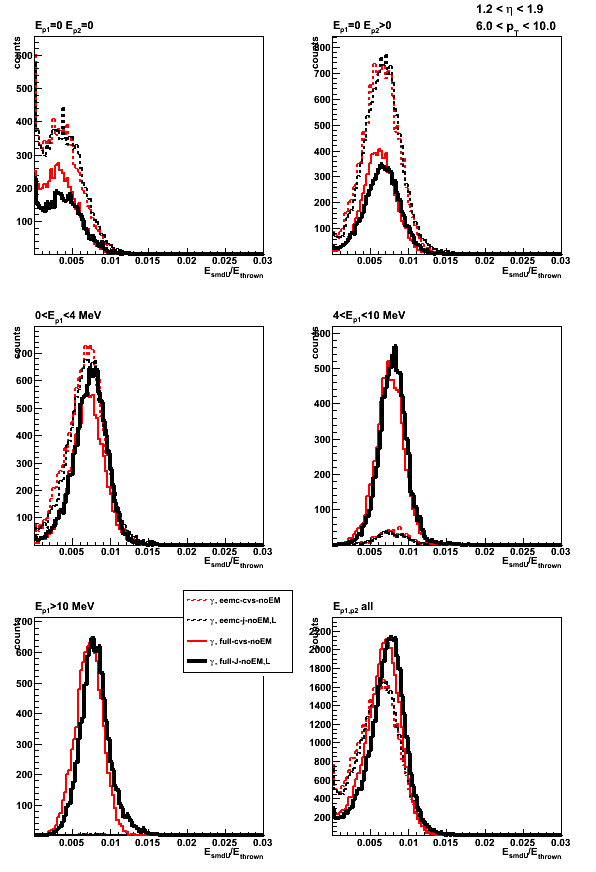
Figure 8: Sampling fraction smd-v
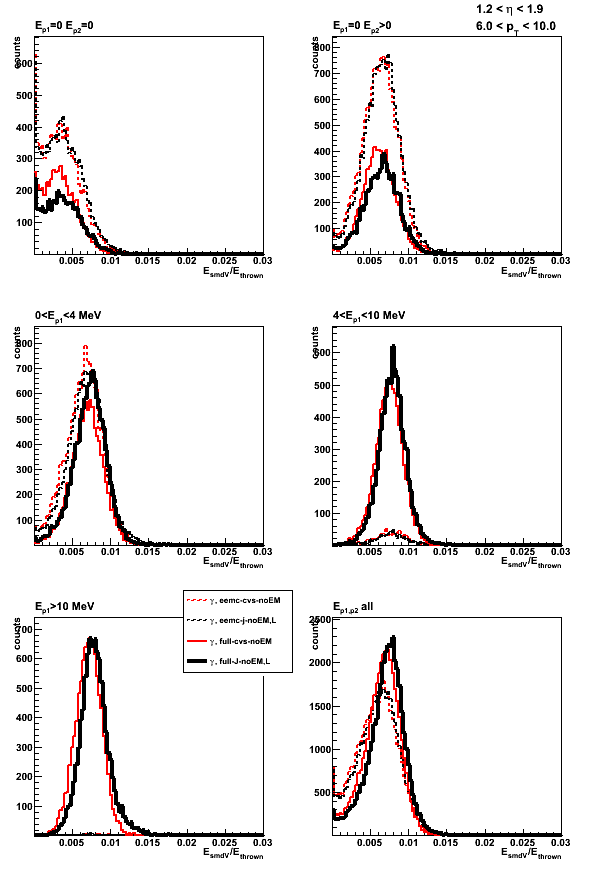
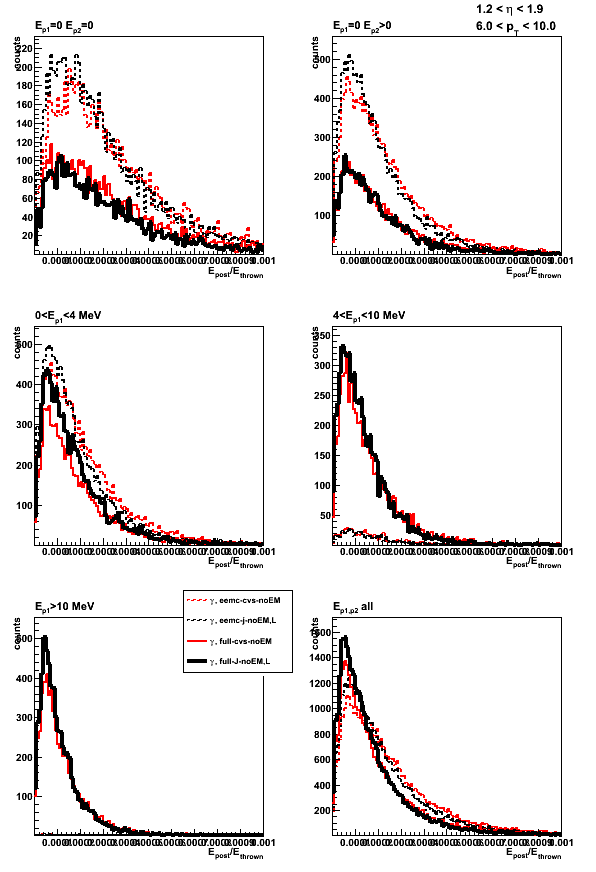
Figure 9: Sampling fraction post-shower
![](/STAR/files/userfiles/133/image/20091027_1/20091027_photons_eemcCvsNoEM_eemcJnoEM_fullCvsNoEM_fullJnoLnoEM_eta120_190_pt60_100_hist1D_samplingPost_log0.png)
Sampling fraction vs. thrown energy
Figure 10: Sampling fraction 1x1 vs. thrown energy
![](/STAR/files/userfiles/133/image/20091027_1/20091027_photons_eemcCvsNoEM_eemcJnoEM_fullCvsNoEM_fullJnoLnoEM_eta120_190_pt60_100_profile1D_sampling1x1_geantEnergy.png)
Figure 11: Sampling fraction 2x1 vs. thrown energy
![](/STAR/files/userfiles/133/image/20091027_1/20091027_photons_eemcCvsNoEM_eemcJnoEM_fullCvsNoEM_fullJnoLnoEM_eta120_190_pt60_100_profile1D_sampling2x1_geantEnergy.png)
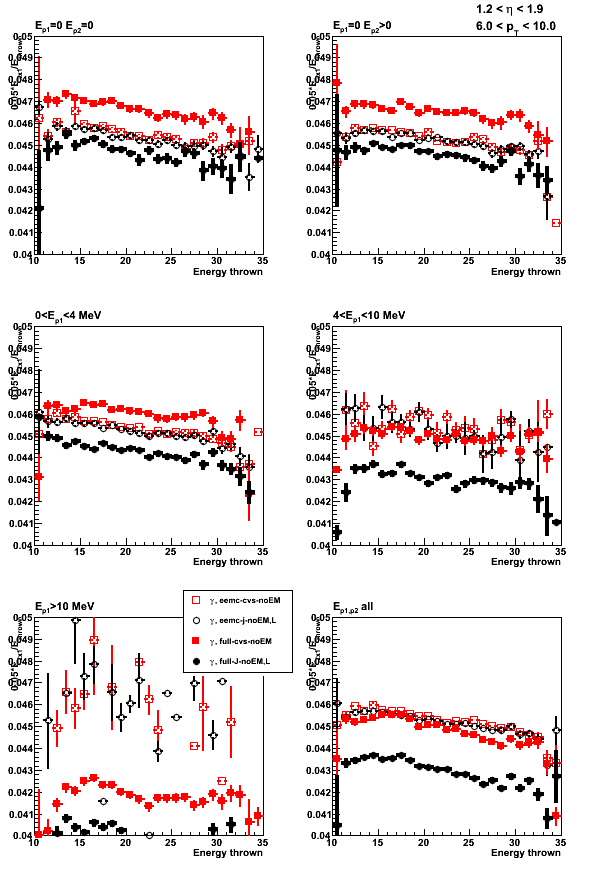
Figure 12: Sampling fraction 3x3 vs. thrown energy
![](/STAR/files/userfiles/133/image/20091027_1/20091027_photons_eemcCvsNoEM_eemcJnoEM_fullCvsNoEM_fullJnoLnoEM_eta120_190_pt60_100_profile1D_sampling3x3_geantEnergy.png)
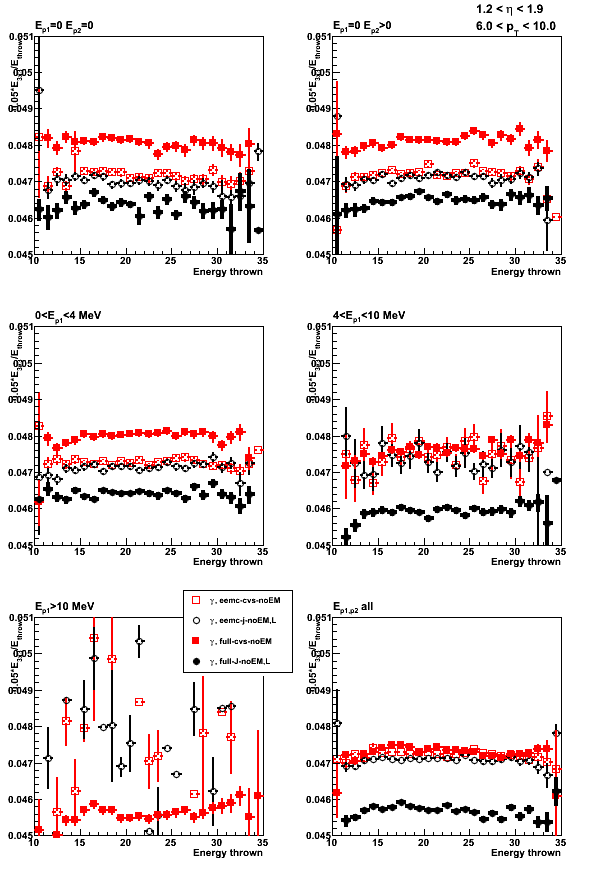
Figure 13: Sampling fraction (tatal energy) vs. thrown energy
![](/STAR/files/userfiles/133/image/20091027_1/20091027_photons_eemcCvsNoEM_eemcJnoEM_fullCvsNoEM_fullJnoLnoEM_eta120_190_pt60_100_profile1D_towSampling_geantEnergy.png)