BEMC tower gain calibration note
1) MIP response : (following Oleg's suggestion)
MIP cuts:
1.a) vertex ranking > 1e6; 1.b) |vertex Z| < 30cm; 1.c) 1 track /tower/ event: 1.d) track p > 1 GeV;
1.e) track enter and exit same tower; 1.f) highest neighboring tower adc - ped) < 2 ped rms;
1.g) adc - ped > 1.5 ped rms; 1.h) no trigger requirement
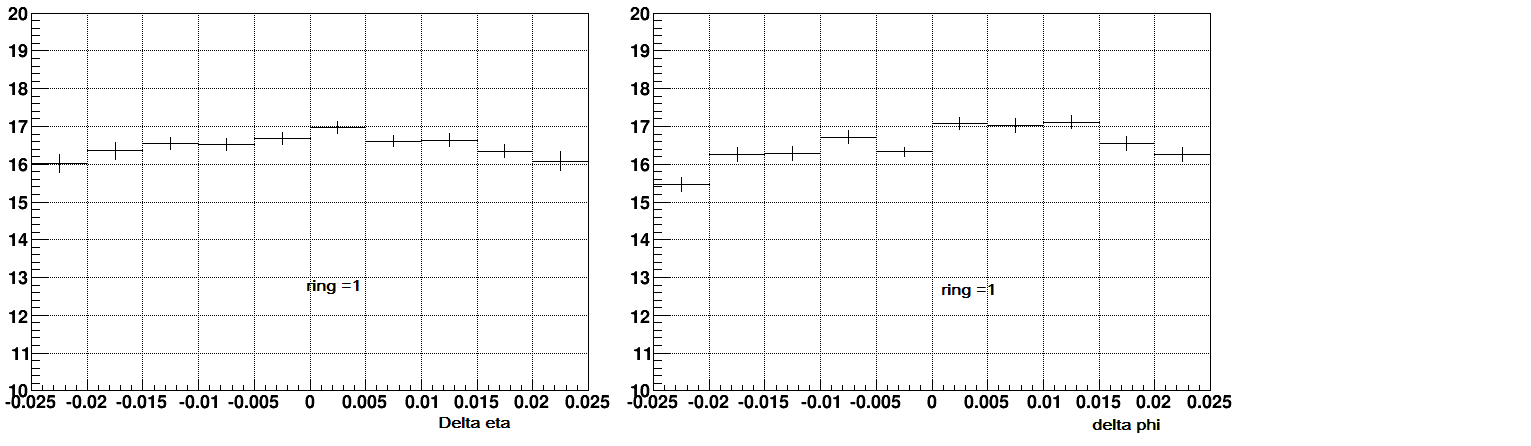
tower by tower plots: (drop off from tower center to edge, TH2D::FitSlicesY() is used, for simple.
MIP vs. delta eta: .pdf
MIP vs. delta phi: .pdf
MIP vs. tower track distance: .pdf
example plot:
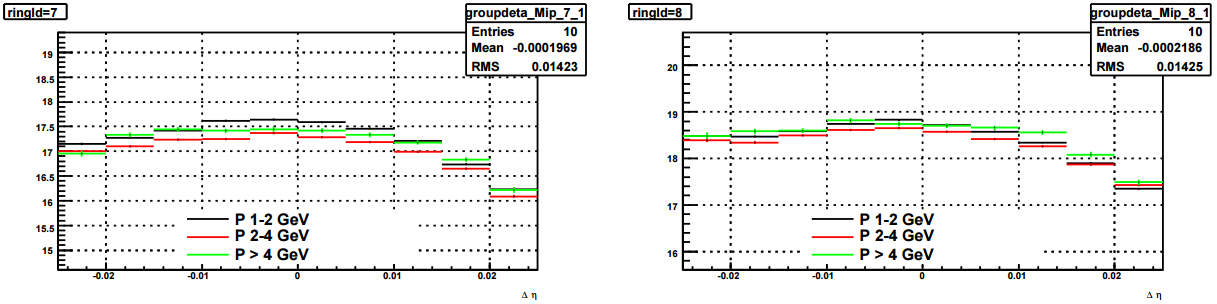
Momentum dependence: combine tower into ring by ring
vs. deta plots .pdf
vs. dphi plots .pdf
vs. dtdr plots .pdf
there is no significant momentum dependence, the dropping off are similarly there for different track momentum ranges.
2) Geant correction: (?? efficiency or energy leakage only)
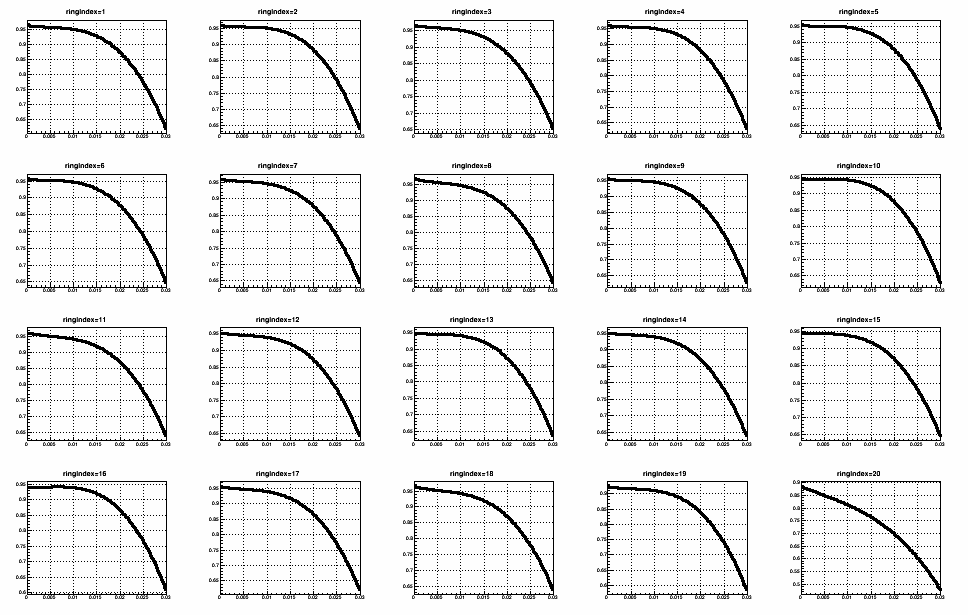
3) E/p vs track position:
Ring by ring plots:
delta eta: .pdf
delta phi: .pdf
tdr: .pdf
example plot:
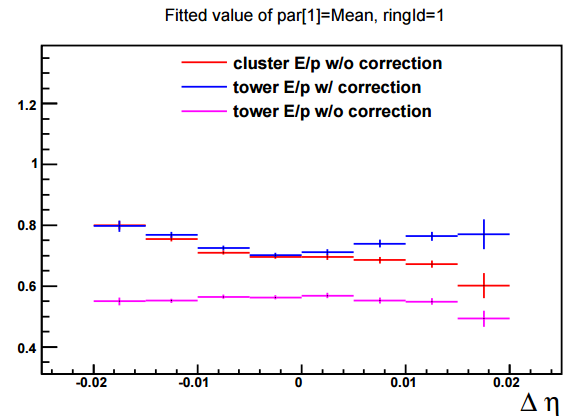
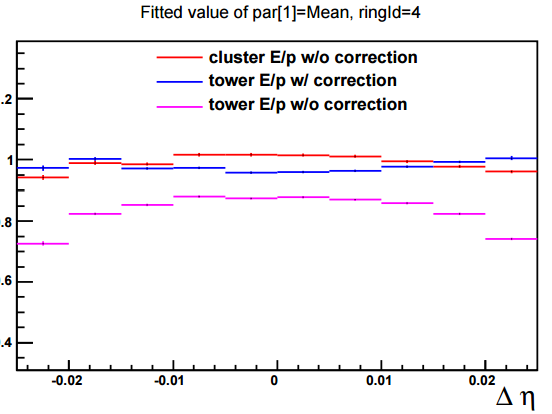
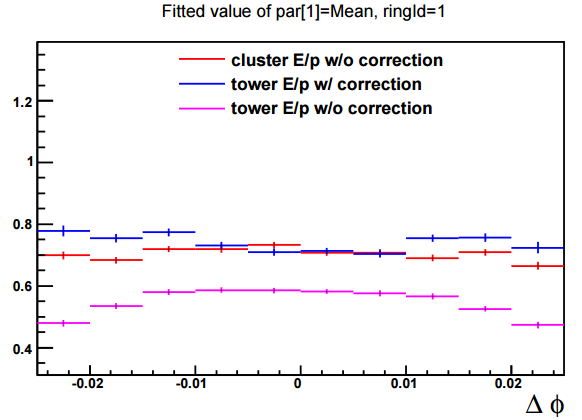

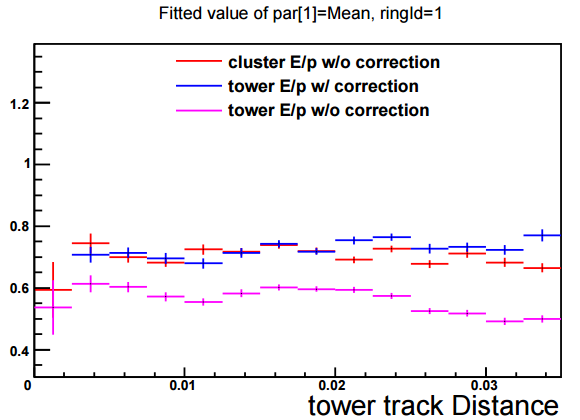
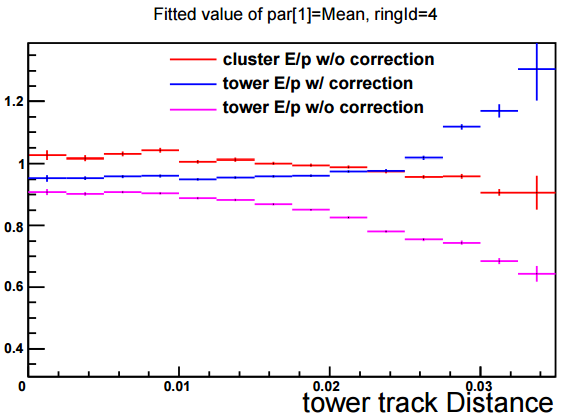

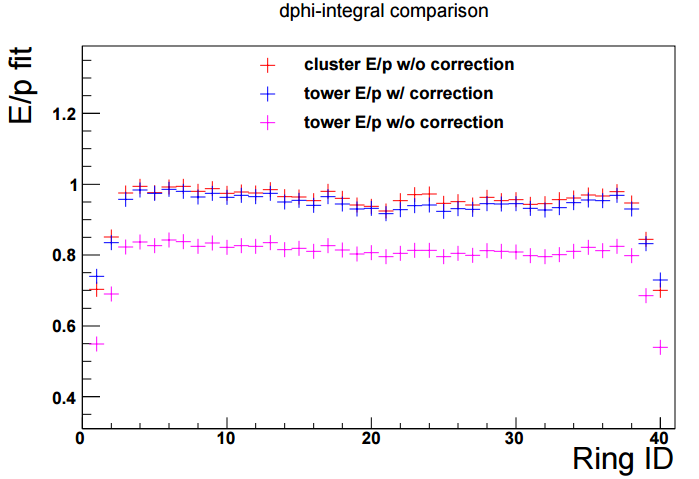
Both 2x2 cluster and corrected tower give close results.
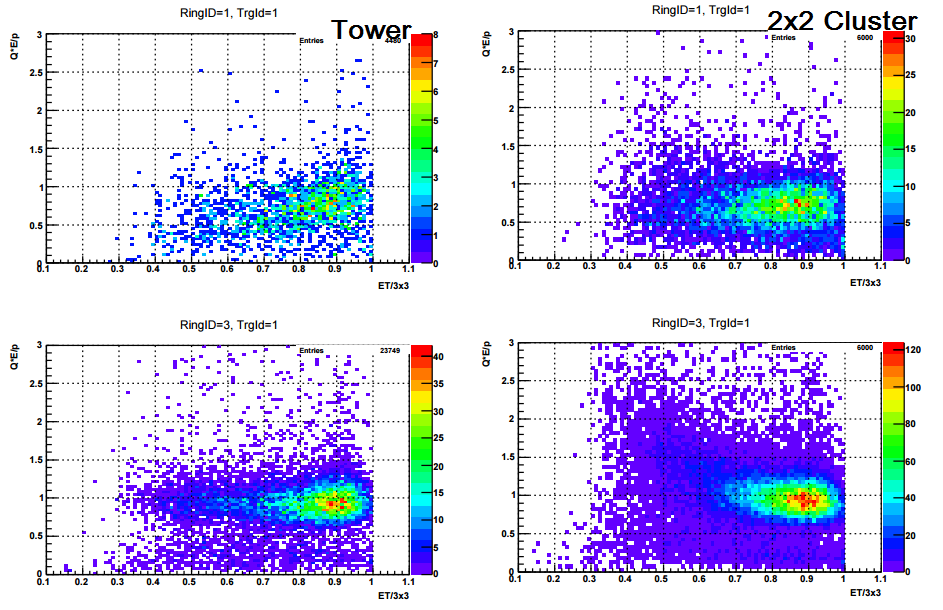
4) 1/3x3 dependence ,
cluster E/p vs. 1/3x3: .pdf ( ps. on Aug 4 emc meeting, that was wrongly 1/5x5, sorry about that)
tower E/p vs. 1/3x3: .pdf
example:
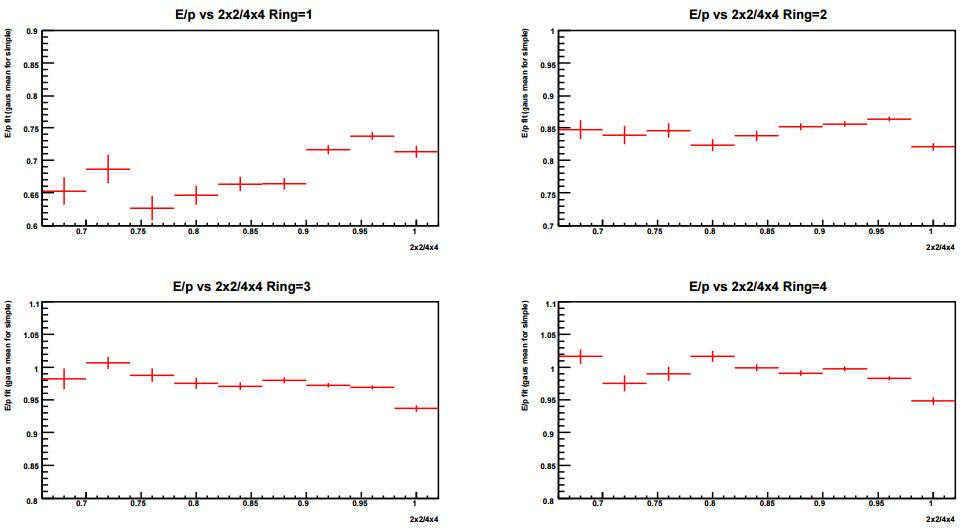
5) 2x2/4x4 dependence
cluster E/p vs 2x2/4x4 (fitted via TH2D::FitSlicesY() .pdf
example:
6) how cluster impacts E/p drop at high momentum, just pick up the "matched track to see the dropping behaviors.
Looks the cluster vs. tower is not the key factor lead to dropping


- jlzhang's blog
- Login or register to post comments