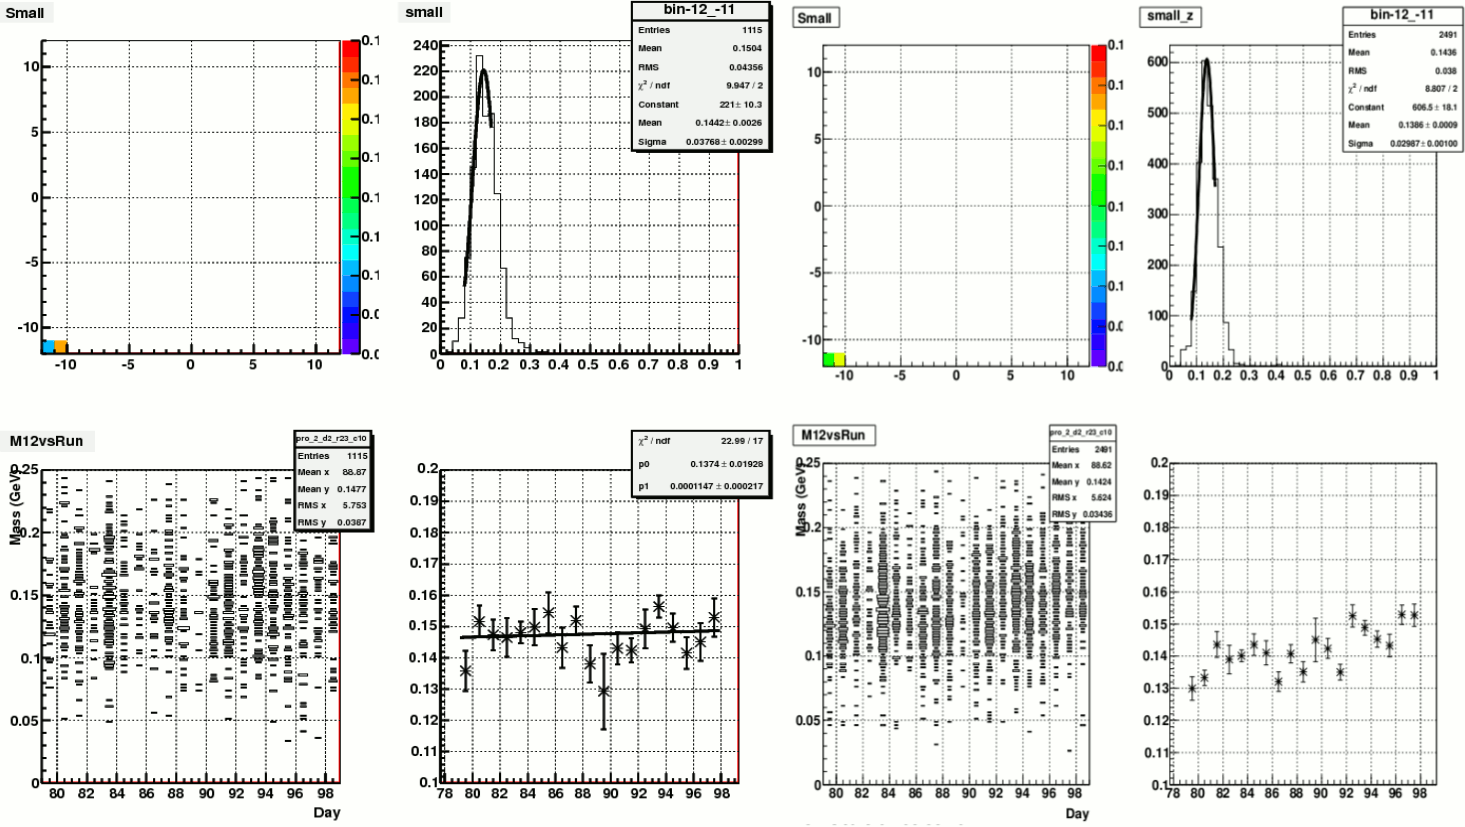
Cell Scan
There was a factor of 50% difference in the number of reconstrcted pions between my fill-by-fill calibrated dataset and the one with Steve's day-by-day calibration, as shown in my previous post.
No matter which calibration we are going to use in the end. It's worth looking into the cause of this discrepancy and see in which aspect we can expect an improvement.
The dataset we are talking about is from day79 to day98 ( Fill15314 to Fill15419, 30 fills )
1. How do we calibrate?
a). Steve's method: Optimize the calibration based on day95 through multiple mass iterations (FMSCORR = FmsCorrD95j.txt). Then follow the variation of the LED peaks relative to the baserun of day95
to make minute-by-minute corrections to the entire dataset. Since it's found that the amplitude of LED pulses exhibited a large drift which does not correlate with the actual gain shift, the dataset is then split up
into subsets according to the day number and the base calibration for the small cells is adjusted for each day by using day-by-day pion masses (with TrigBit 0x200).
b). My (sloppy) method: The base calibration was the one calulated for day80, that I got from Steve (file time stamp: Jun 7 20:06). For each fill, I set the calibration of the 1st run to be the same as the base
calibration, and follow the LED peak variations relative to the 1st run to make time dependent corrections to the rest of the runs in this fill.
2. Yield difference
(a) (b)
Figure 1. Pions on one small cells. (a).with my calibration; (b) with Steve's calibration
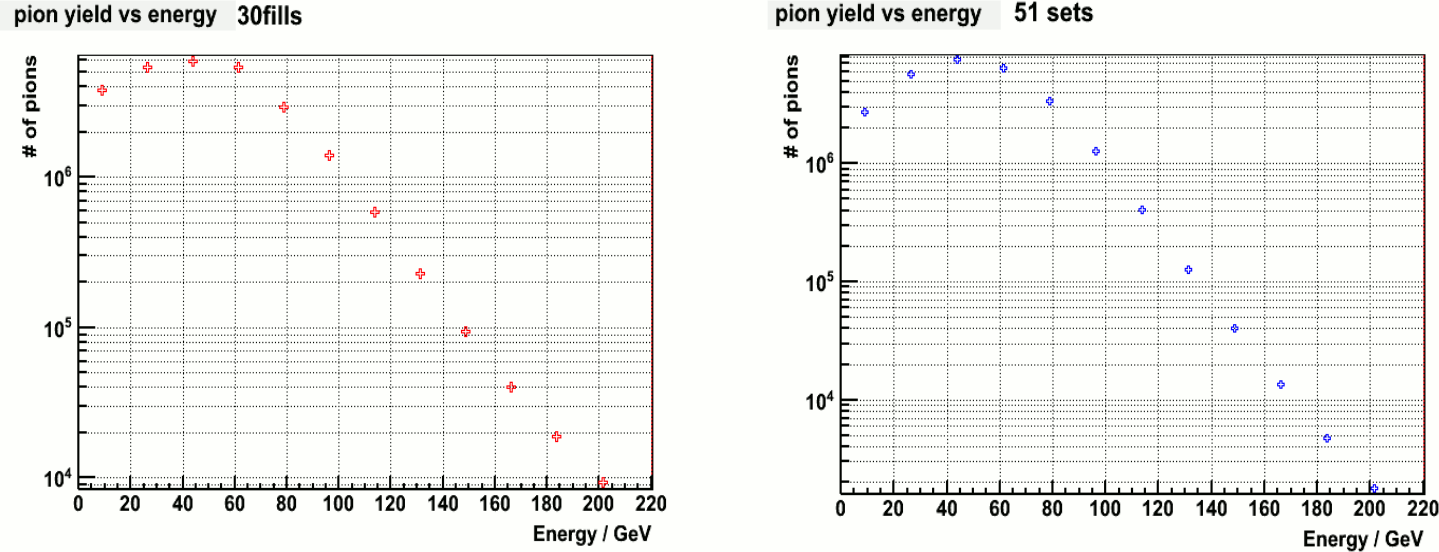
Figure 2. Pion yield vs Energy. Left: with my calibration ; Right: with Steve's calibration
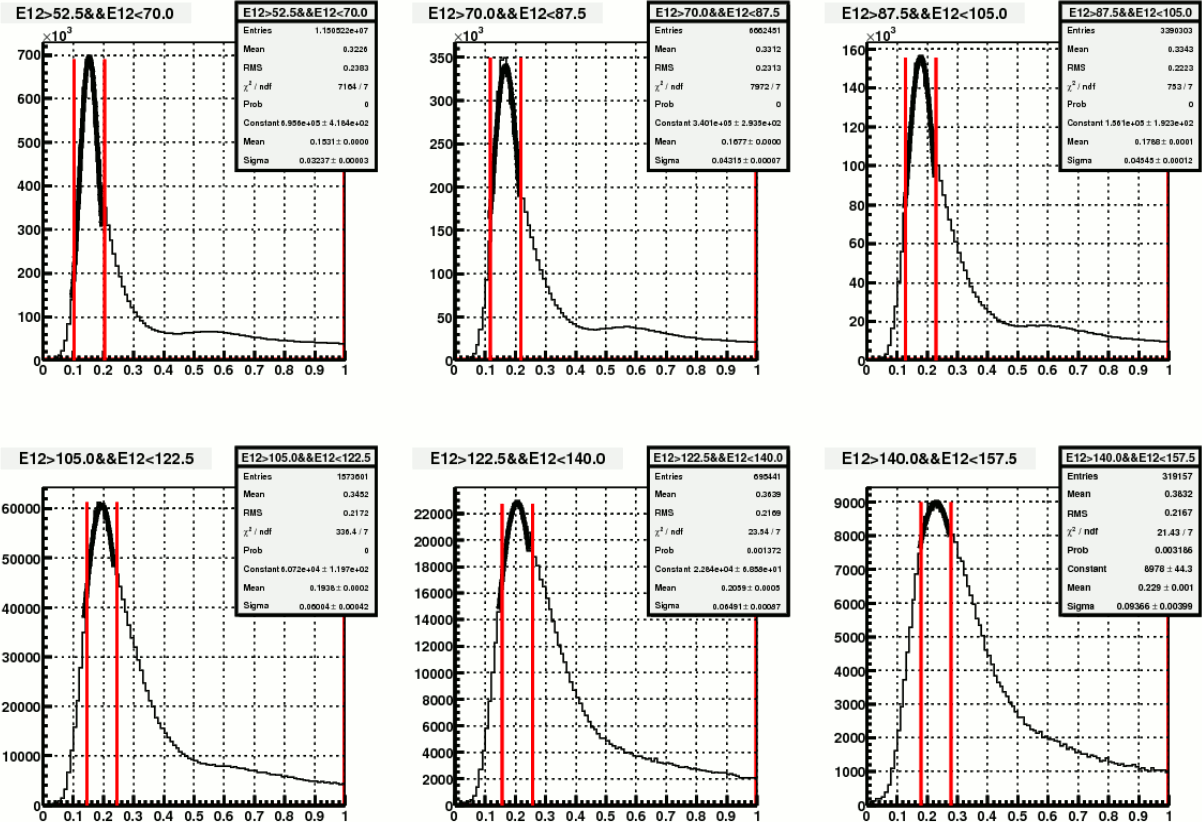
Figure 3. pion mass window
3). Reasons:
One can immediately identify 2 possible reasons for these differences. First, the base calibrations are different (FmsCorrD95j.txt is better?). Secondly, Even with the same
base calibration, Steve's method is effectively equivalent to my method plus a day-by-day reiteration.
Somehow I started with examining the effect of one more mass iteration. The following plots show before and after mass iteration on Fill15419 (day98), with my calibration.
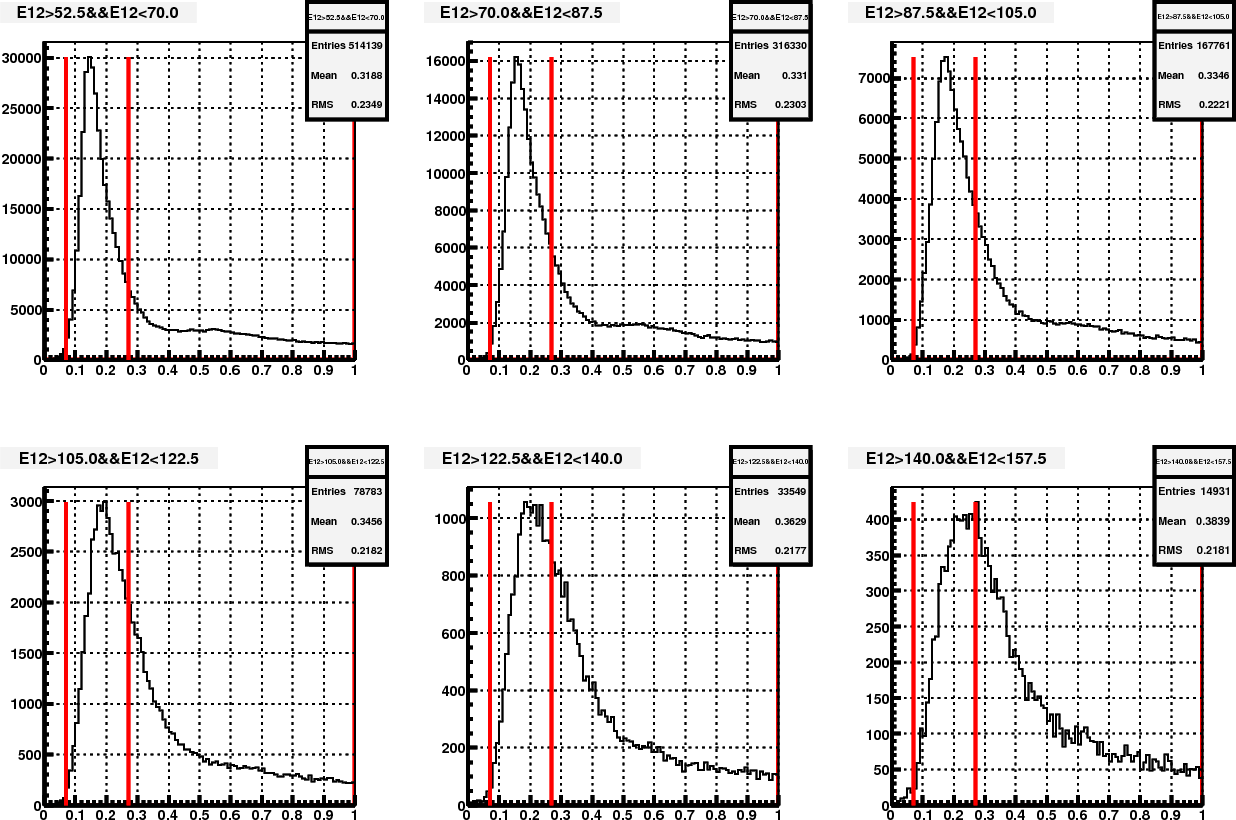
Figure 4. Mass distribution in different energy bin, before re-iteration
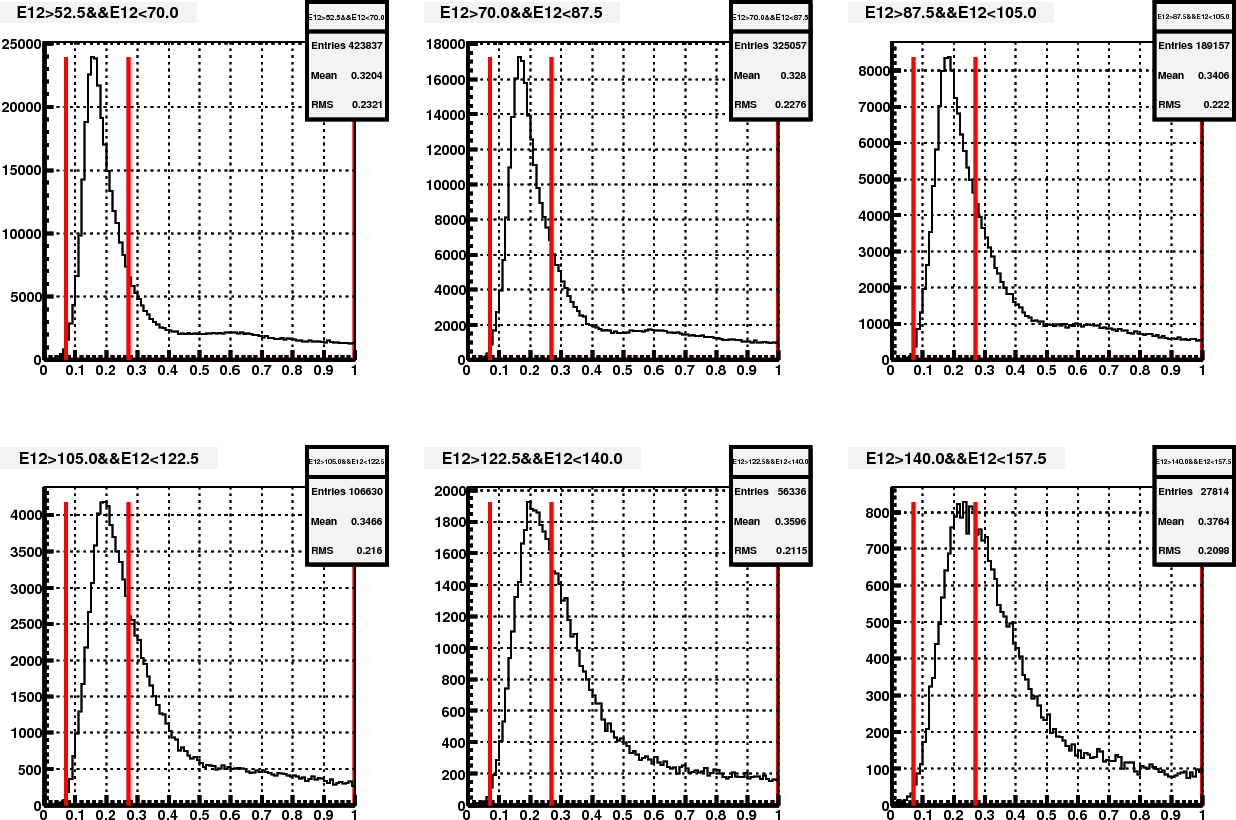
Figure 5. Mass distribution in different energy bin, after re-iteration
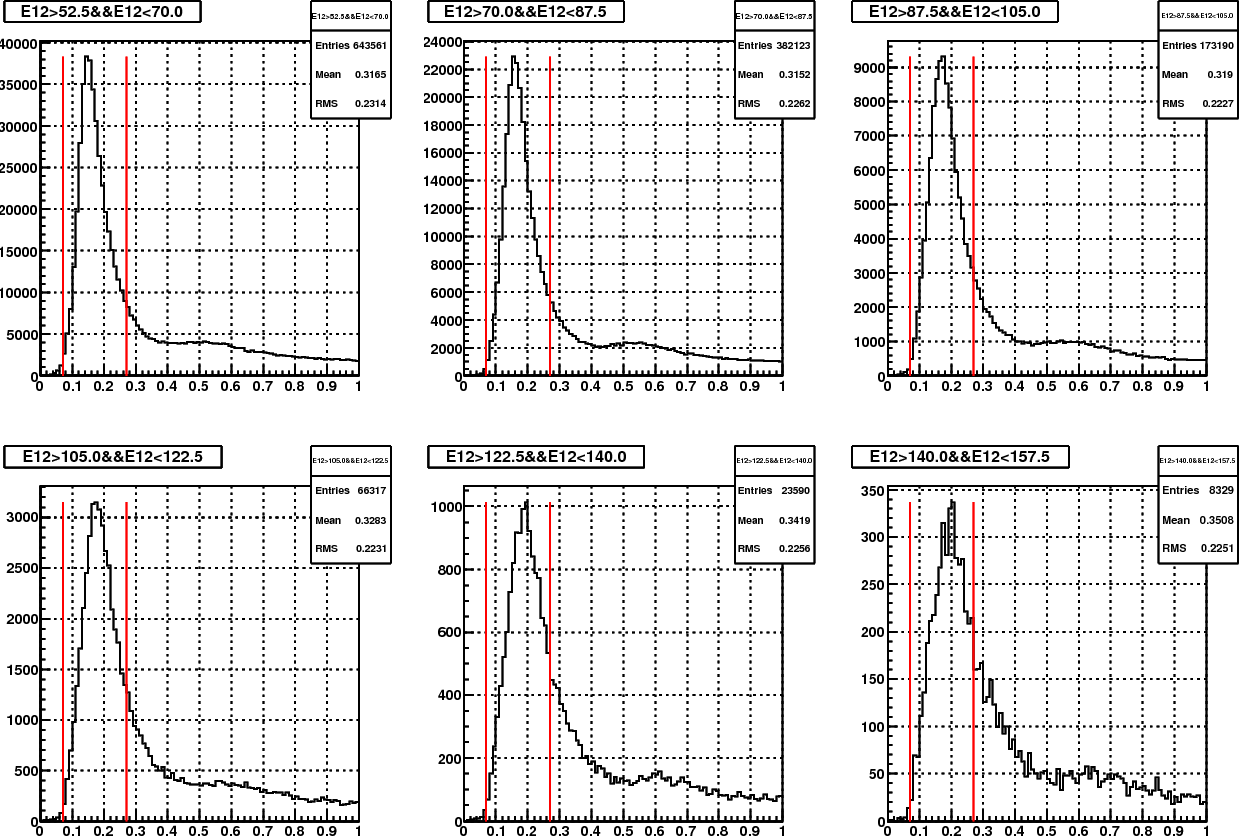
Figure 6. Mass distribution in different energy bin, with Steve's calibration
Then the main difference between fig.5 and 6 is in the base calibration. Other than this, there are also minor differences in the pion samples that are used in the mass
iteration.
4). Question: Is it possible that the miscalibration of a few hot/warm cells could have generated these differences in the overall mass spectrum?
Cells that get most of the triggers need more attention in tunning the calibration. Those places are where most of our dectector acceptance went. Therefore it's necessary
to keep a record of each cell's performance, and identify a list of hot/warm cells to work on. This inspired the effort to maintain a status table which can be made
available to the iteration routine and cluster finder. So that we can focus on the mostly triggered cells (and their neighbors) during calibration, and eliminate problematic
cells in reconstruction.
Building status tables:
The idea is to use a structure similar to the Cell class in the PSU package, but equipped with an array of run-dependent objects. Each object represents the state of the
corresponding cell at a particular run. It maintains several histograms such as ADC and LED spectra, LED vs event number, and the associated pion sample reconstructed
with the current calibration. By evaluating the above features of each run-dependent object, I defined a status bit which encodes the performance of the cell. This status bit can
be accessed later by the cluster finder to decide whether to keep the clusters which cover any particular cell in question. Following is a schematic of the data structure
of the CellScan package.
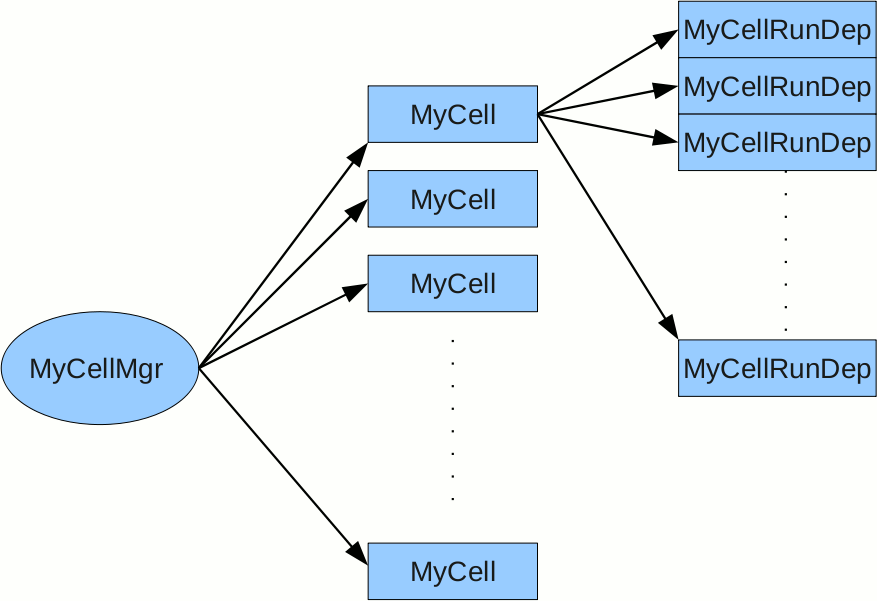
Figure 6. data structure of CellScan package, which is used to analyze cell status
MyCellRunDep is the run-depended object that represents the status of the cell at each run. It maintains the following components:
a). ADC distribution of real events from the current run
b). ADC distribution of LED events
c). ADC of LED events vs time (relative LED event number)
d). Status bit of the cell at the current run
e). 2-cluster(photon) sample associated with the cell (impact point of the highe E photon is on the cell)
All the above data are from a single run
MyCell represents an actual cell and is the master object of MyCellRunDep. It holds an array of MyCellRunDep objects and other static information
such as the physical location of the cell, its gain and base gain correction factor. It also has the capability of retrieving associated pion samples from
multiple MyCellRunDep objects (multiple runs) and combining them into a bigger sample.
MyCellMgr is the manager class. It is in charge of reading adcTr.root and Output.root files and populating the adc spectra and pion sample of each cell.
It also analyze the ADC spectra and assign the status bit to each cell. In the end, it writes each MyCell object to a root file so that one can read and update
those information later on.
I've run this routine through Fill15419. The results of all of the cells are attached below. Following plot is an example of a single cell
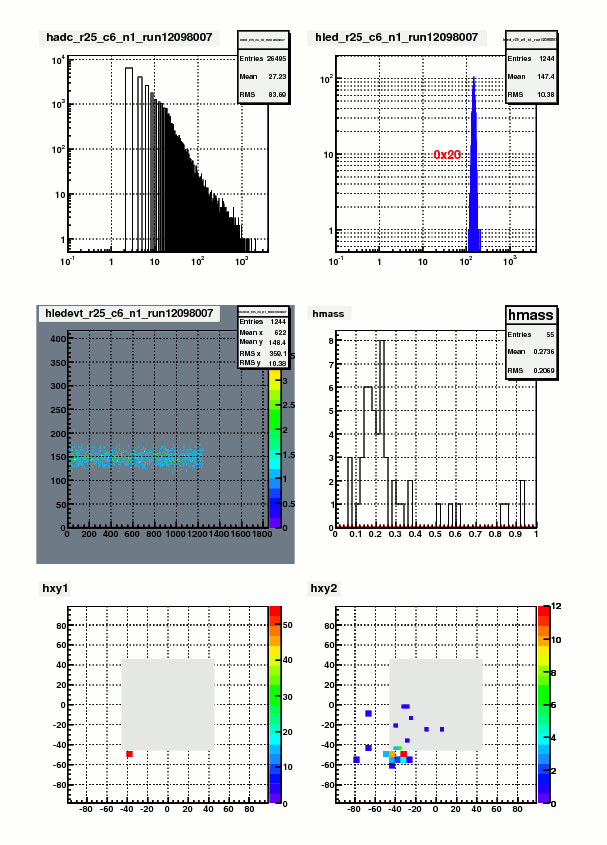
Figure 7. Result of the CellScan routine
From upper left (up->down, left->right), these are: ADC spectrum of real events, ADC of LED events, LED vs LED event sequence number, Mass distribution
of the associated 2-cluster sample (cluster selection cut "Ntracks==2&&N12==2&&abs(E12-40)<20&&Esoft<1&&Z<.7"), impact point of the primary photon (high E photon),
impact point of the partner photon. The first 3 histogram are only from one run(12098007) while the last 3 figures come from the combined pion sample of the whole fill.
Currently I assign the status bit according to the ADC spectra of real and LED events. I calculated the trigger rate of each cell with a constant threshold of adc = 100.
Then compare the rate of each cell to the average rate of large/small cells separately. Here is the bit assignment scheme:
bit 0: set to 1 if TrigRate < AveRate / 10;
bit 1: set to 1 if TrigRate > AveRate + 3*RateSpread;
bit 2: set to 1 if gain correction factor == 1 (no vaild calibration);
bit 3: set to 1 if # of LED events < 0.5*norminal # LED events;
bit 4: set to 1 if RMS of LED peak / Mean LED ADC >= LedBadTh = 0.5. To identify noisy cells
bit 5, 6, 7 encode bit shift, range from 0 to 7.
As an example, following are the status bit distributions for run12098007
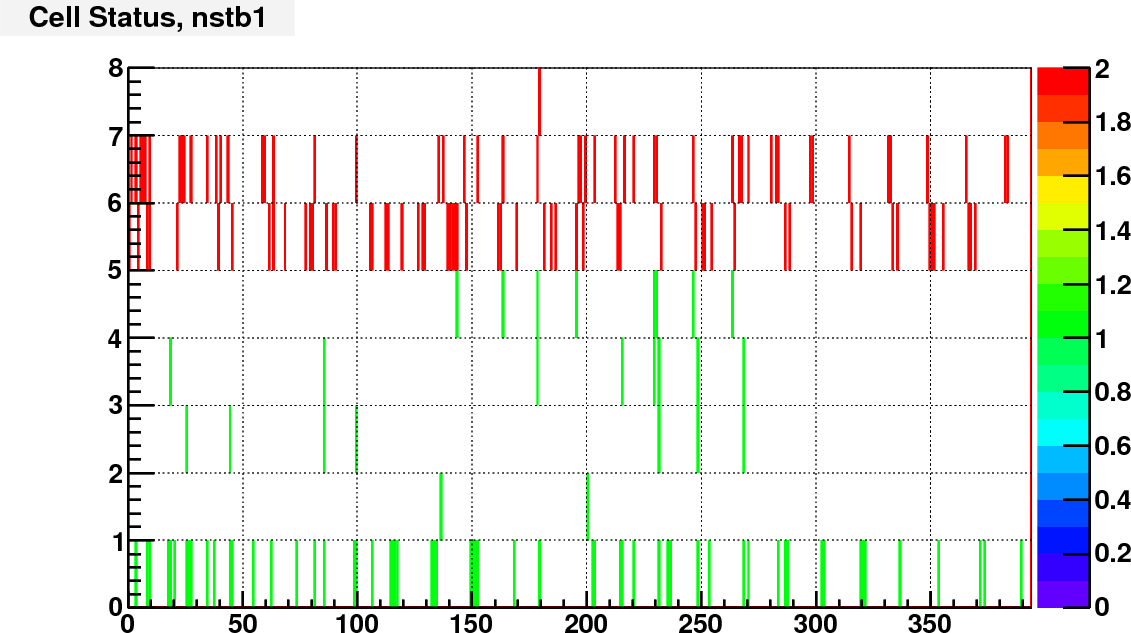
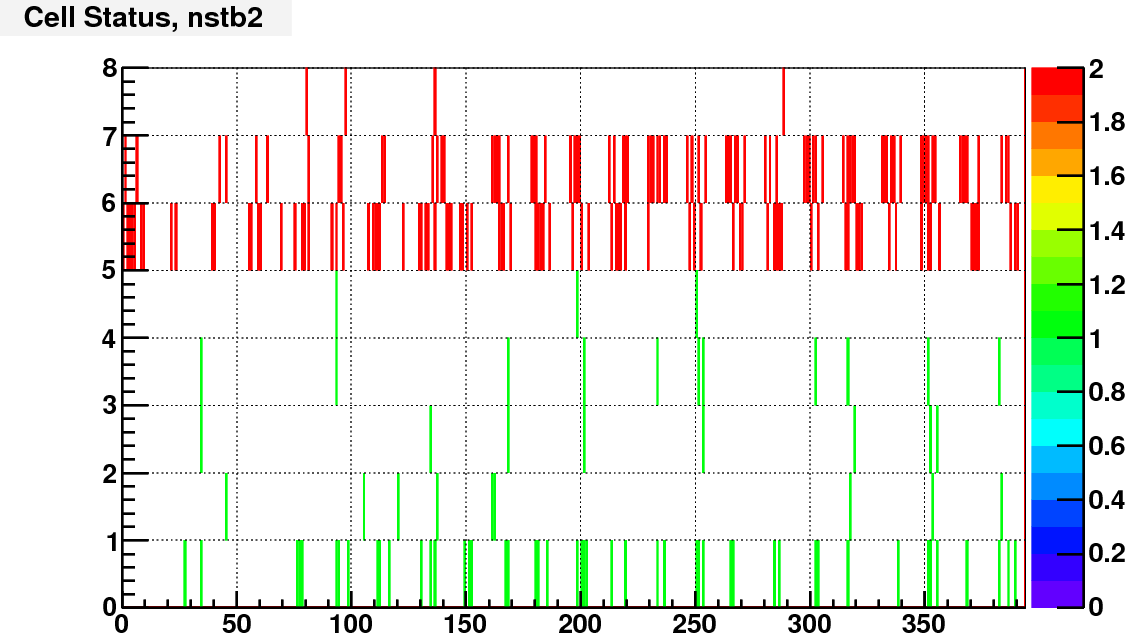
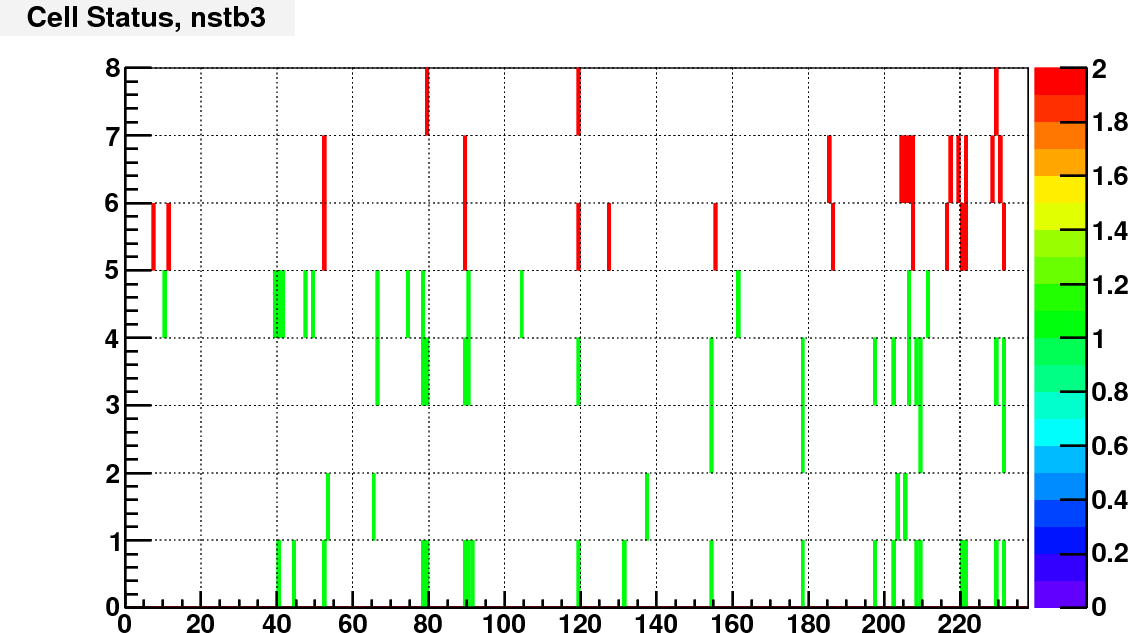
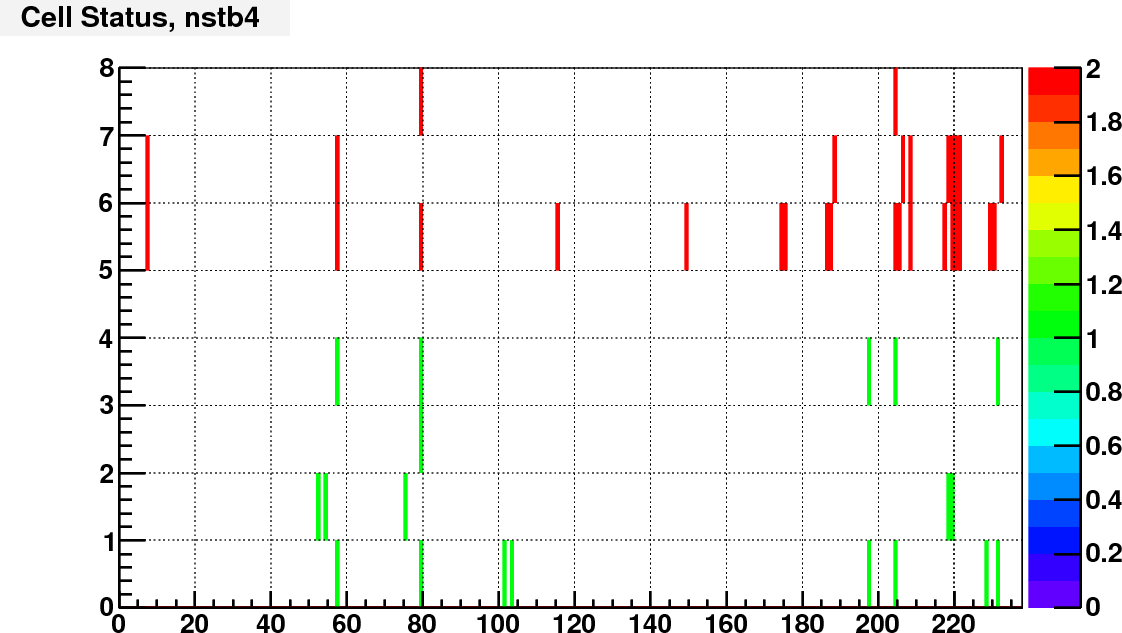
The next step is to consider if there are other information that can go into the status code, and try to make this status code available to the cluster finder.
- yuxip's blog
- Login or register to post comments